

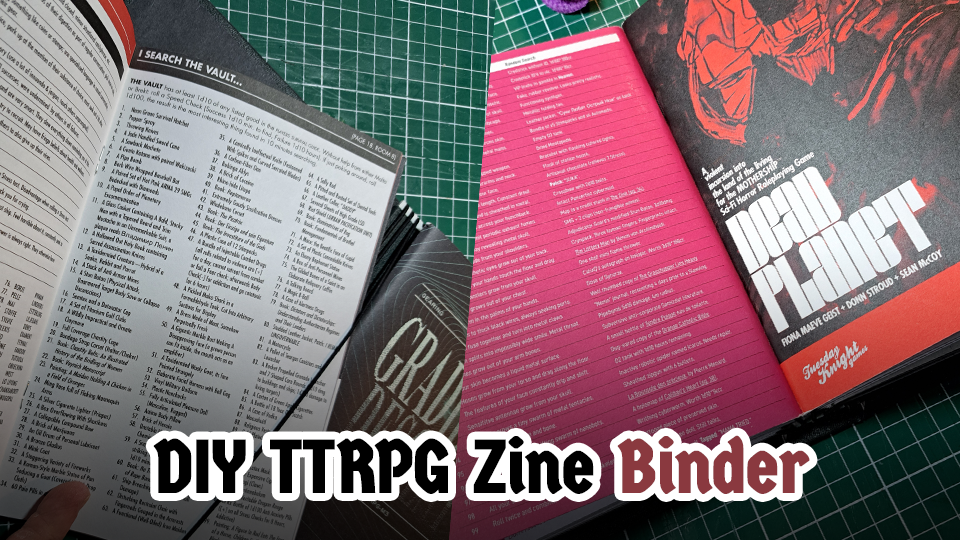
Much of my (and presumably your) favorite TTRPG content these days is found in the form of zines, a great and accessible way for smaller publishers to get their games to you in physical form!
However, they don’t exactly work well on shelves and they are definitely more fragile than most books. So what is a zine owner to do? Well, you make: a Zine binder
Isn’t that hard?
Nope! And I will walk you through the process right here! Let’s get started shall we?
Now, I know this blog is quite lengthy but do not let this discourage you, it’ll probably take you about 30 minutes without drying time to first time you make one. I can now make these in 15 minutes or so, so it’s really not a huge time sink!
Part 1: Materials and tools
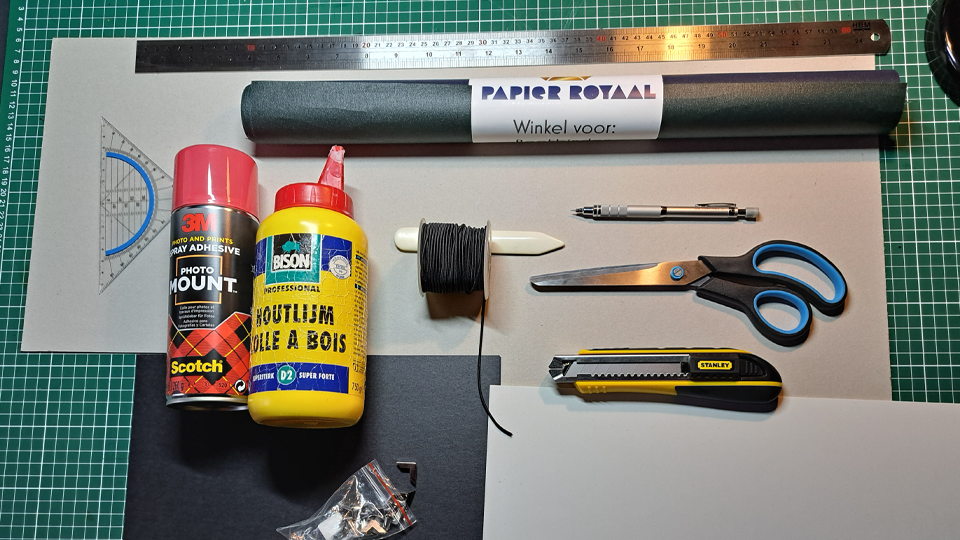
In order to make your binder, you will need some stuff. Most of this is readily available online in almost any country.
Materials:
- Grey board 2 or 3 mm (this is the cardboard for the cover pieces)
- PVC plate/plasticard/polystyrene plate 3mm not thinner if you can help it. (these are all names for the same stuff, modelling shops have this. It’s basically a solid sheet of PVC, do not use foamboard)
- cloth-wrapped elastic, I’m sure there’s a better name for this but I don’t know it, sewing stores will have this. I’d generally recommend 2-3mm in diameter (mine is a bit skinny)
- Wood glue/PVA glue
- 3M photomount permanent adhesive spray (this is technically optional, but I find it much more convenient than PVA for some parts)
- Hammer on metal book corners (these are available in a variety of sizes and finishes, do not pay more than a few bucks for a bag online, because that is a ripoff)
- Cover material, there’s a lot of options available for this at bookbinding shops but the one I recommend is by FAR the most forgiving: Acrylic coated book cloth. This is basically a tightly woven fabric with an acrylic coating. It’s very durable, doesn’t stain and won’t go horrible if you get glue on it. Look for this at bookbinding suppliers, it comes in a bewildering array of colors, some even have sparkles!
- Kraft paper (I think that’s what it’s called) any heavy weight colored or decorated paper, this will be your inside cover
Tools:
- Metal ruler
- a straight angle ruler (the triangle thingies)
- pencil
- utility knife
- Sharp scissors
- Bone folder (these are usually plastic, very cheap, and highly recommended. A blunt butterknife will do in a pinch if you’re careful)
- A small triangle file (the warhammer hobby kind, not pictured)
- A small hammer (non-marring preferred but you’ll probably be ok)
Part 2: The inner spine/elastic subassembly
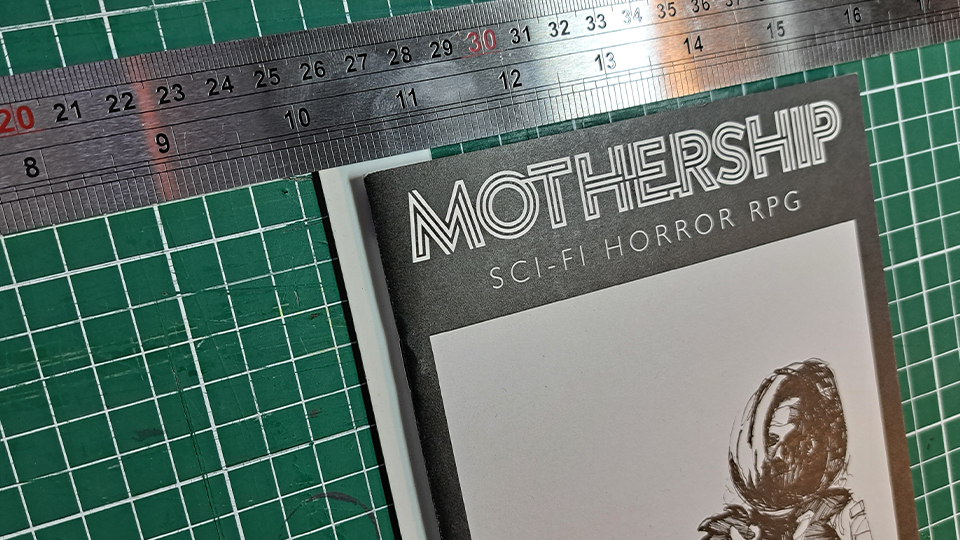
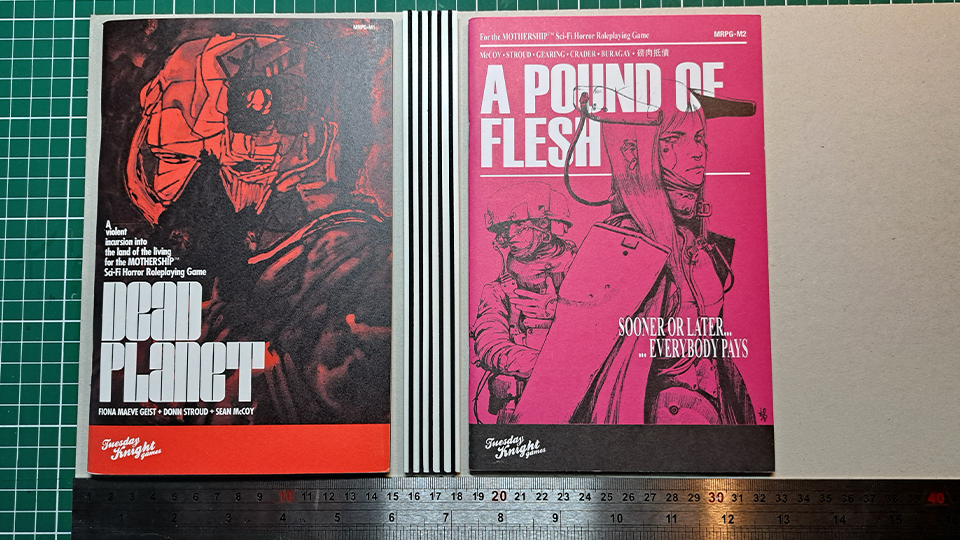
Once you have all of the required materials on hand, it is time to do some figuring out. Grab your zines for this, stack them and pick the tallest if there is any size variance.
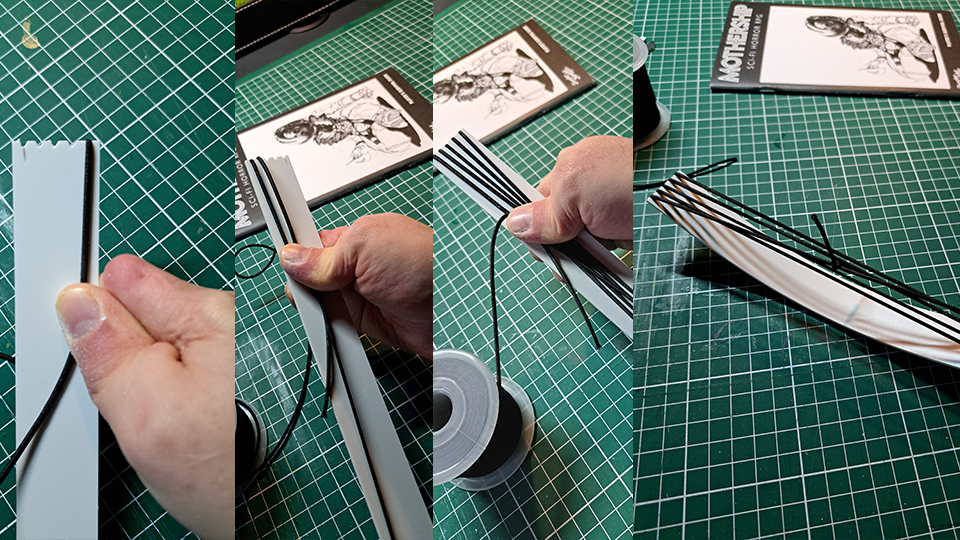
The first thing we are going to make is the plasticard inner spine that will house the elastic that will keep our zines in the binder. Plasticard is a bit of an unusual material in that you don’t actually have to cut it all the way through. You only have to score it a few times with the knife and then bend it and it will snap pretty cleanly in half. For the width of your spine you need to consider how many zines you want to accommodate, personally I think 5 is about my sweet spot.
The width of your spine should be approx. : N * 5mm + 5mm (I actually do 6) where N is the number of zines. Mark that distance along the top edge of your plasticard.

Make another mark the same distance from the side further down the plasticard (use your straight angle ruler) and then get out your metal ruler and utility knife. Snap off the knife so you have a nice fresh tip and score the plasticard gently 2 or 3 times. Do not put excessive pressure on the knife, rather lean on the ruler so it stays put. Afterwards, snap off the strip of plasticard. This strip will be what holds the elastic for our zines.

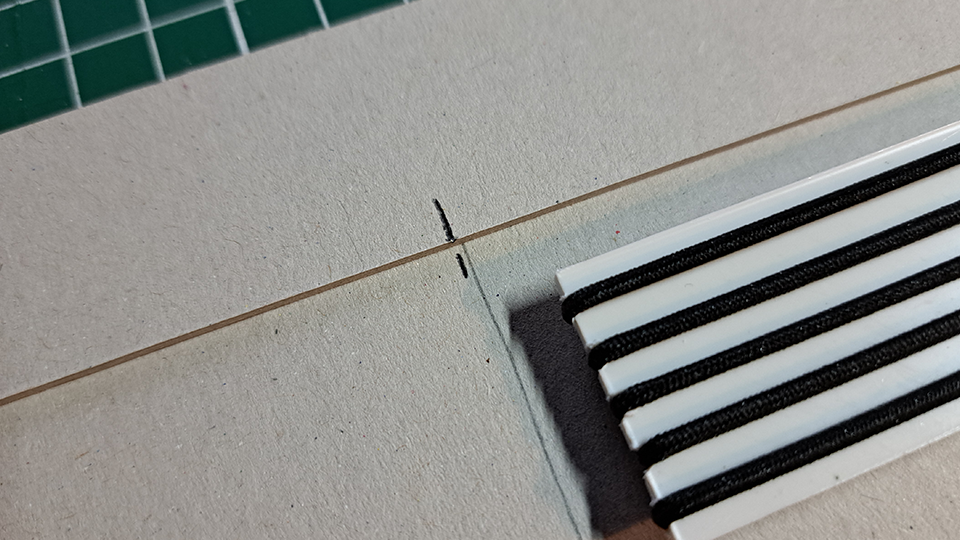
We will now need to cut the strip to the appropriate length. Grab the tallest zine and place it on the strip, then move the zine down 3-4mm.
Now mark the plasticard along the bottom edge of your zine, and then again 3-4mm below that. What we’re doing here is adding space at the top and bottom for your elastic to sit without interfering with or damaging your precious zines later. If in any doubt: longer is better here.
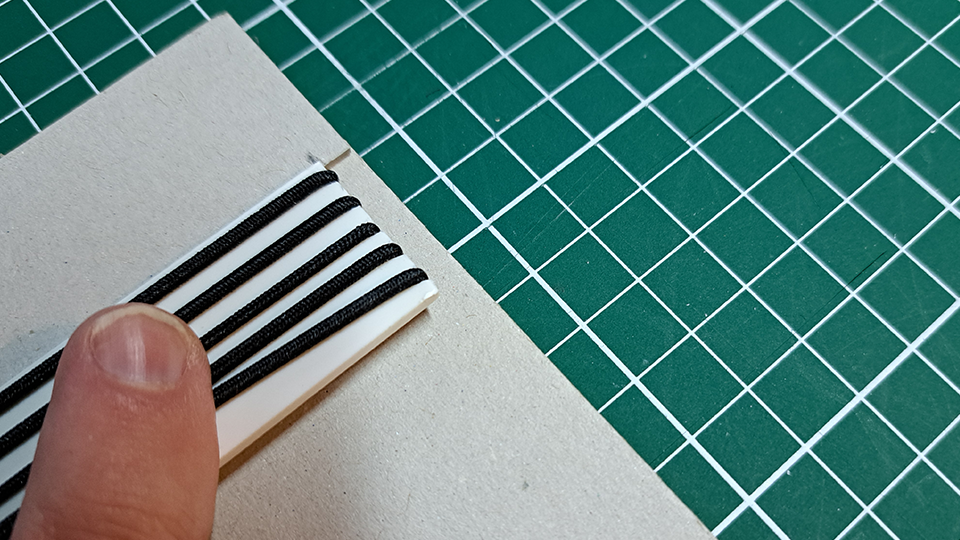
Now we need to mark where we are going to file notches into the plasticard that will hold onto our elastic. Measure 2.5/3mm from one side and make a mark. Then move your ruler over so 0 is at the mark, and put a pencil mark every 5mm. You don’t have to fret about being overly precise here, just try to get a somewhat even spread.
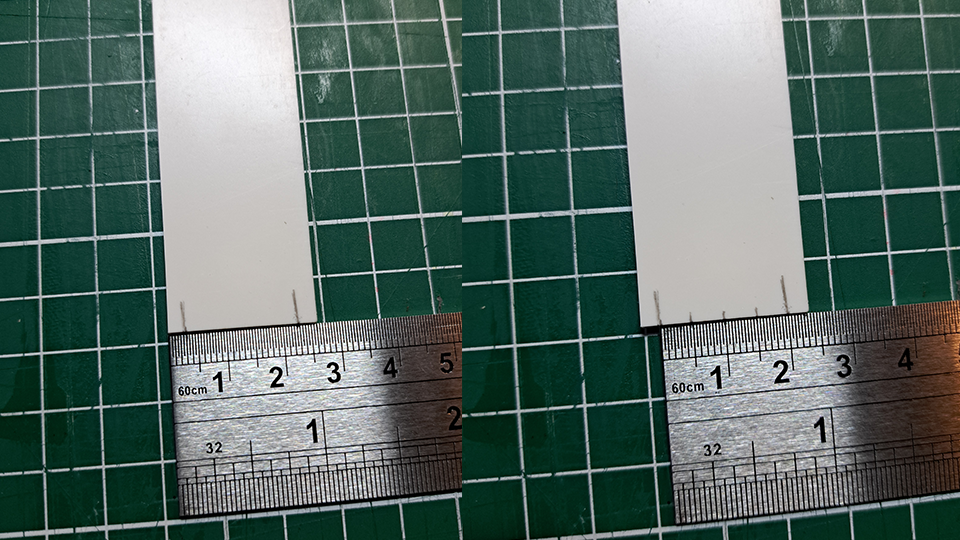
Grab your little triangle file, and begin filing a V shaped notch on each mark, they should be deep enough that your entire elastic fits in them.

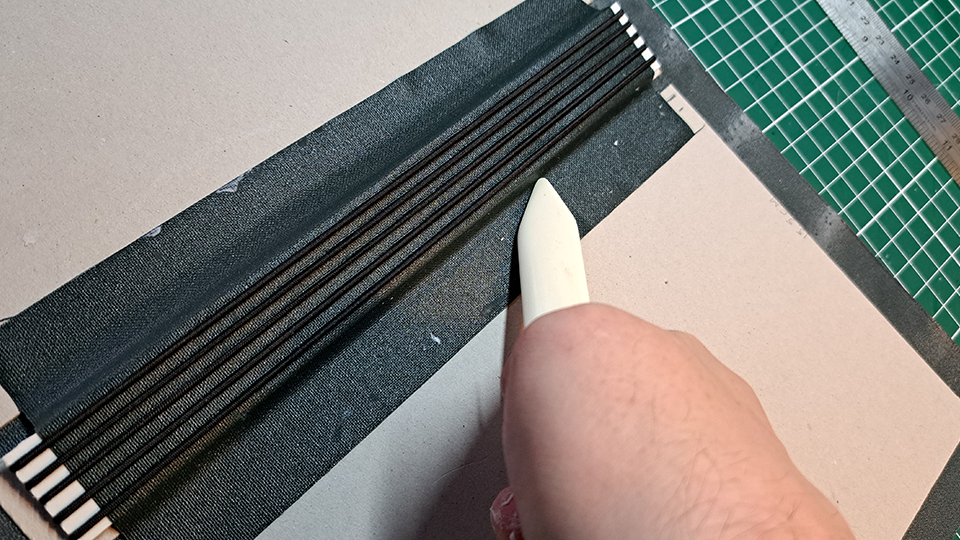
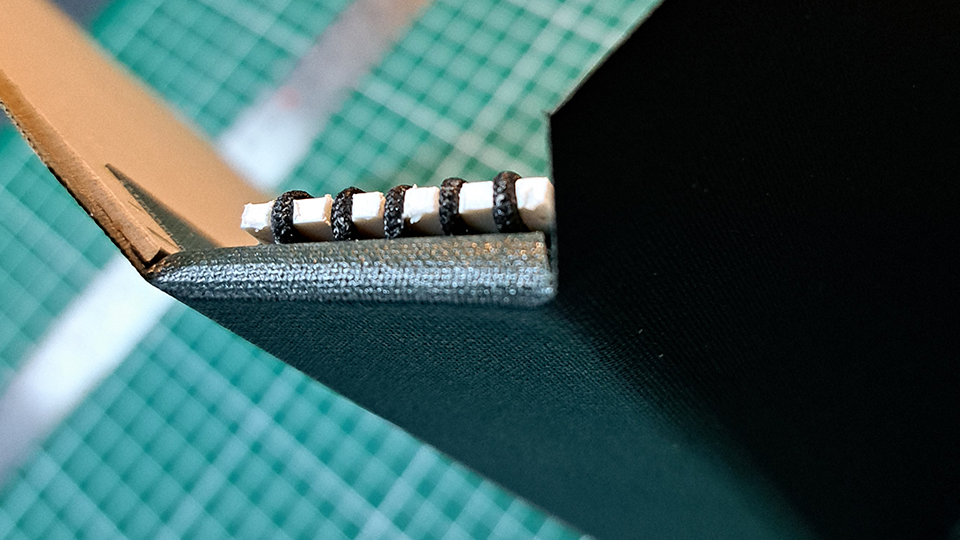
Now, hold down the end of the elastic about halfway down the plasticard, and begin looping the elastic around it, going through the notches. You want to maintain some tension on it, because that’s what will hold your zines in place. You don’t have to over-stretch the elastic or anything, just make it a little tight. Then snip the elastic and tie a knot in the ends once you have completed all loops
if you’ve done everything correctly you now probably have a very bent looking piece of plasticard.
This is actually completely normal, now what you do is is grab the elastic on the “outside” and pull it up out of the notch to even out the sides. It’s a bit hard to explain but once you do it it’ll make sense. Do this little by little for every notch until the card (mostly) flattens out.
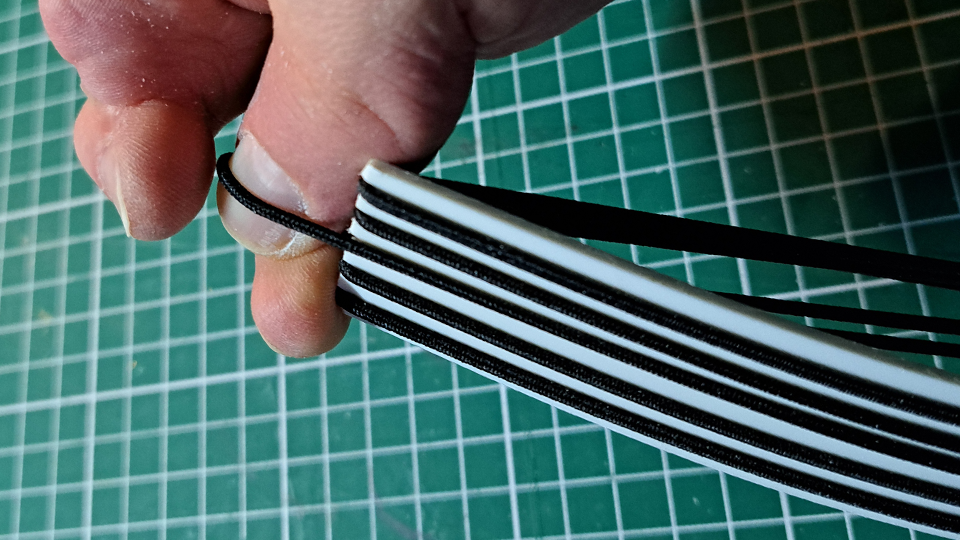
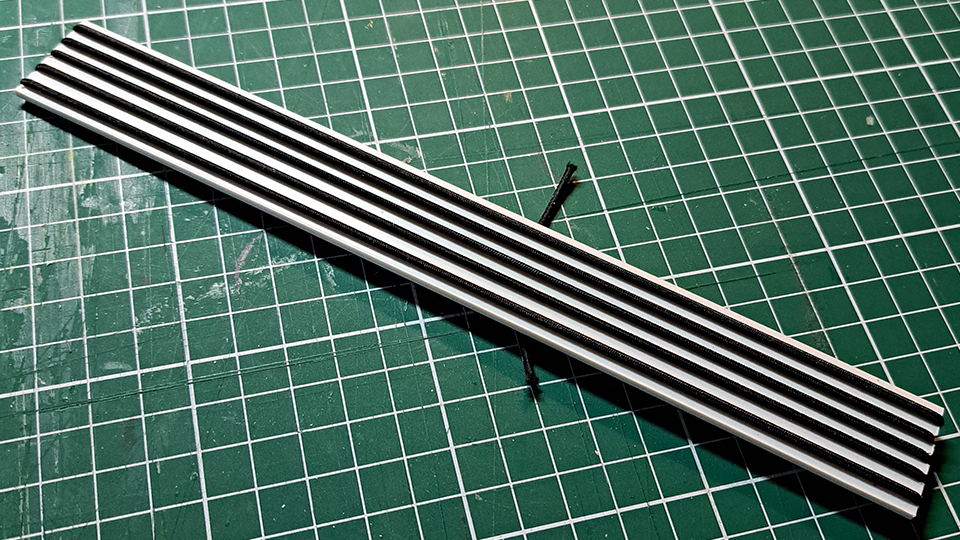
Now trim off the excess elastic from the knot. I’d recommend dry fitting a zine at this point, just to make sure you haven’t made any silly mistakes!
Part 3: The outer cover
A binder is useless without a cover, this is the next point on our agenda. It pays to be somewhat precise in this step for a clean result at the end!
I like to line up my items to get a general idea first. The factory edge on your card (and the 90 degree corner) may be off, so check that with your straight angle and ruler.
Note: It’s not the end of the world if it isn’t exactly perfect but if it is WAY off you may need to make your own 90 degree corner
Now, what you want here is to build in some margins. Your front and back covers will need to be larger than your zines on all sides, 5mm is about right. Your spine piece ALSO needs to be larger than the plasticard on all sides, but can be a little less on the top and bottom edge. Obviously the covers and the spine must be the same height.
I measure the width of my zine and add 1 cm, and the width of my plasticard and add 5mm.
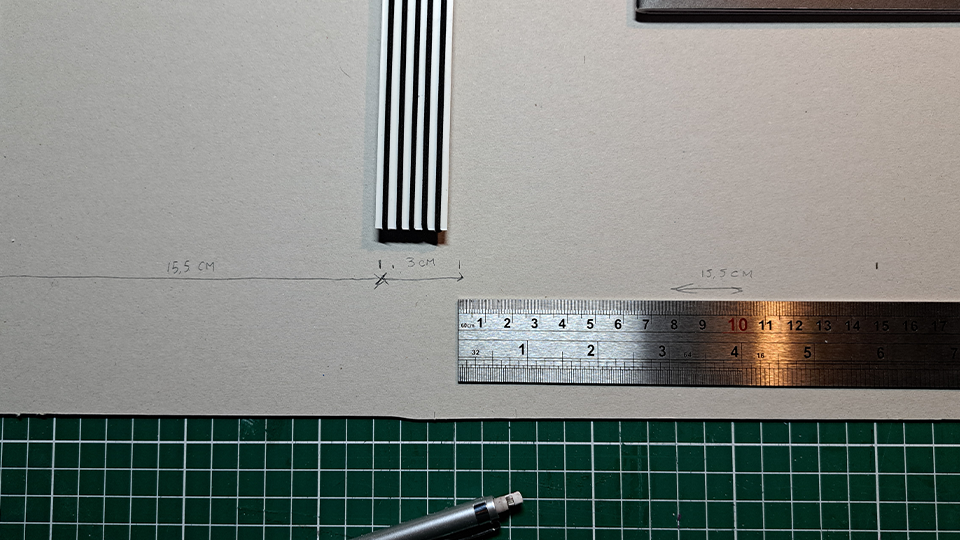
Write this all down, your greyboard is a great place to do so! We don’t have to worry about the height at this point.
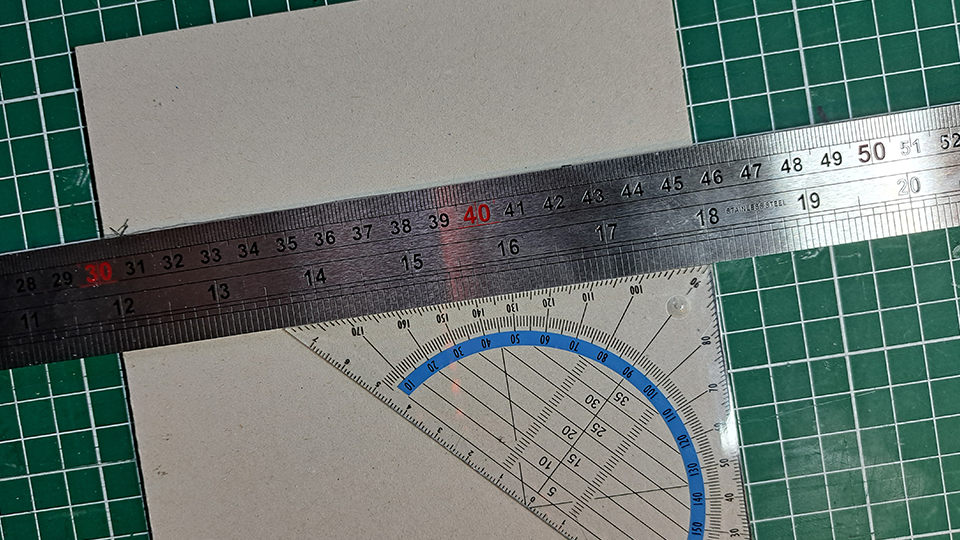
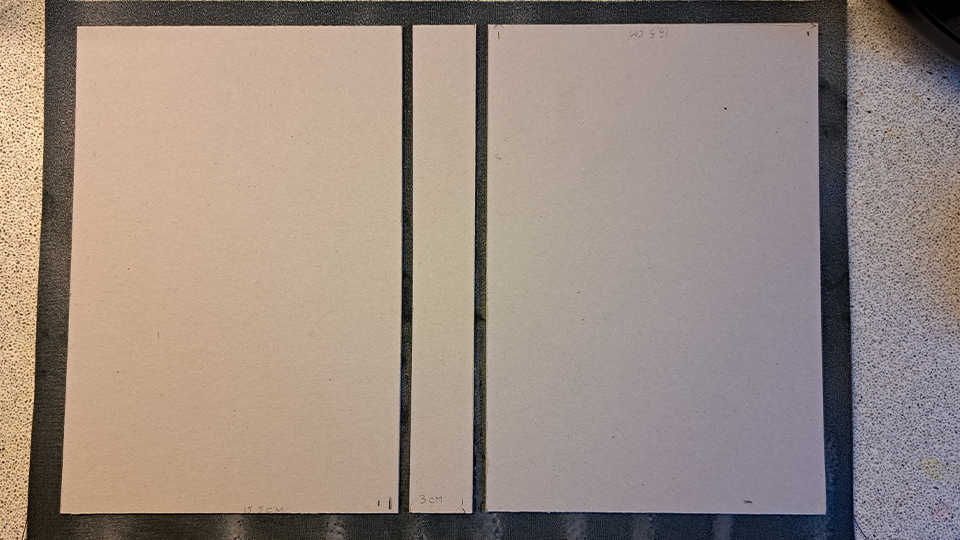
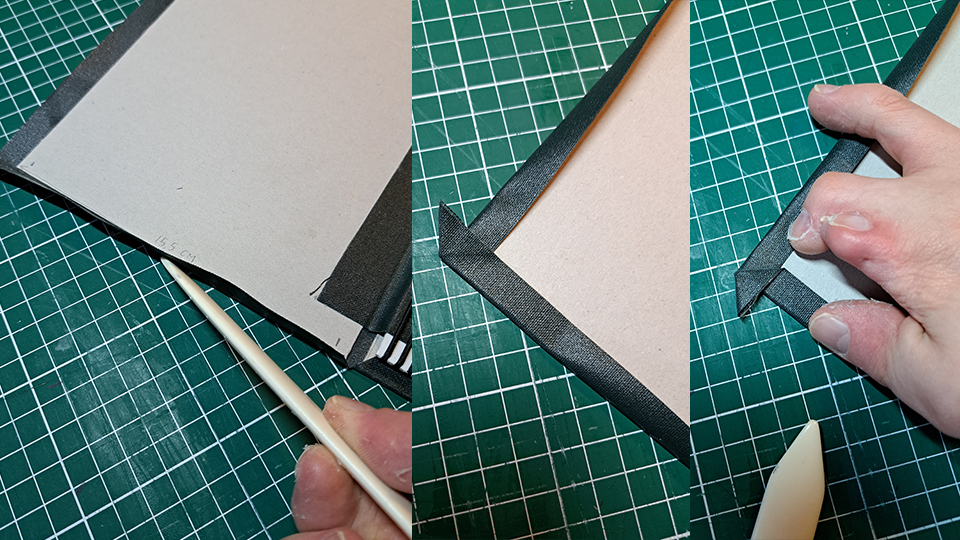
Mark your widths along the top edge of the grey board, in my case this meant a mark at 15.5cm, at 18.5cm and one more at 34cm. Now the part that is a little tricky, combine your ruler and right angle such that you can draw a vertical line straight down the grey board. This is admittedly fiddly, but you can check your corners with your right angle and make adjustments if needed. Measure twice, cut once.
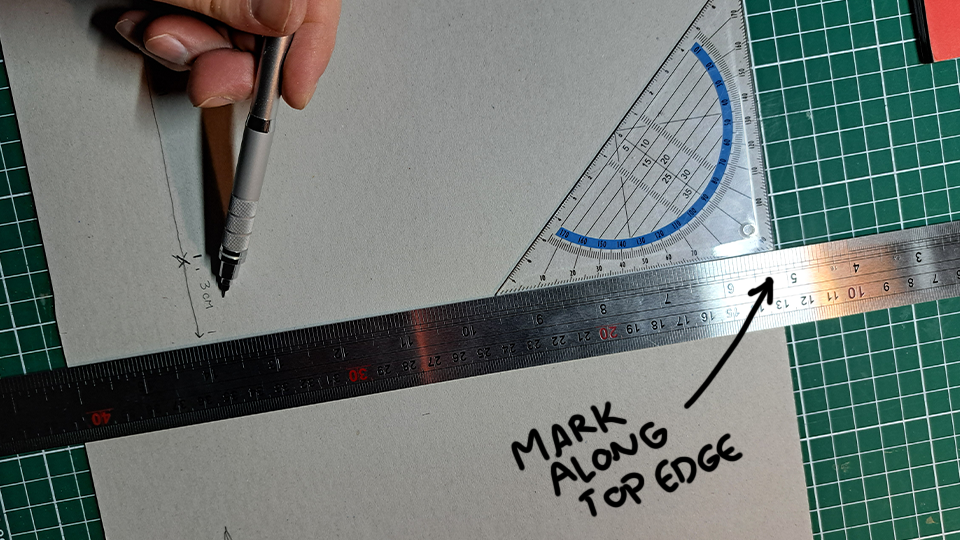
Once you’re happy with your vertical lines, use your utility knife to cut along your ruler on your pencil lines. Again, do not try to cut the board in one go with a ton of pressure, instead lean onto the ruler and cut through the board in multiple light passes instead.
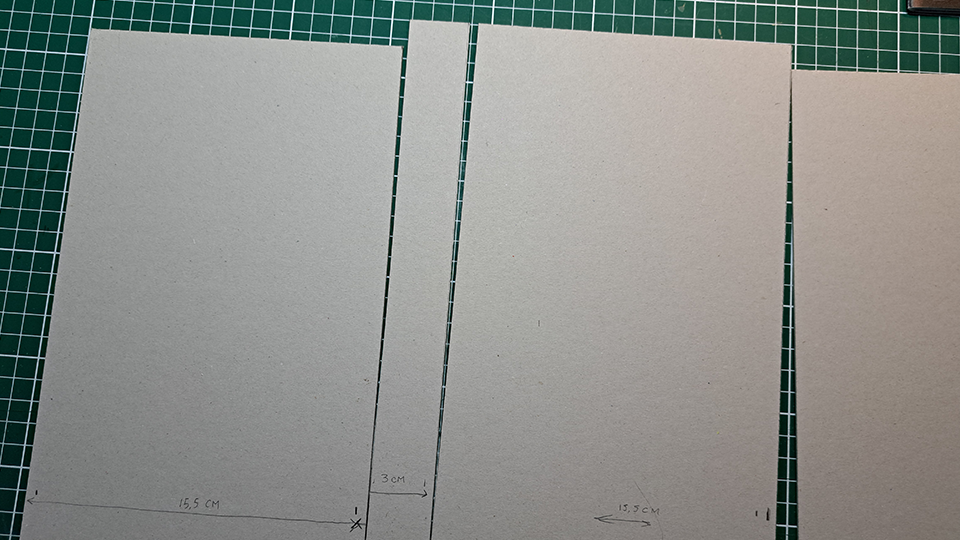
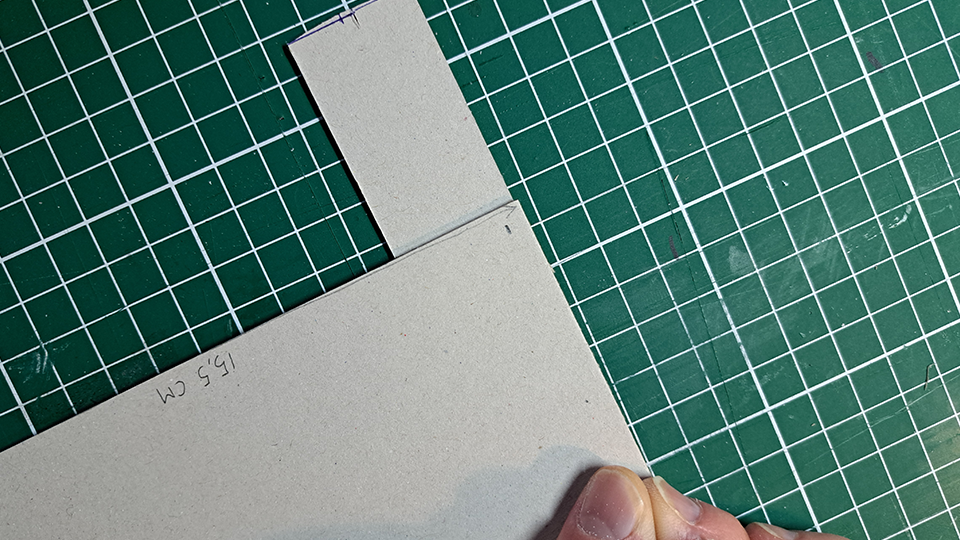
Your pieces will be much too long at this point, and that is perfectly fine! stack the two covers (they should match pretty closely at this point, trim one if this is not the case) and place your plasticard on top, nudge it down a bit so you create the top margin. You can measure this if you like, 3-4mm is about where you want to be.
Now direct your attention to the bottom of the plasticard, add the same amount of margin below it (more or less, this isn’t especially precise) and make a pencil mark. This will be the height of our covers and spine.
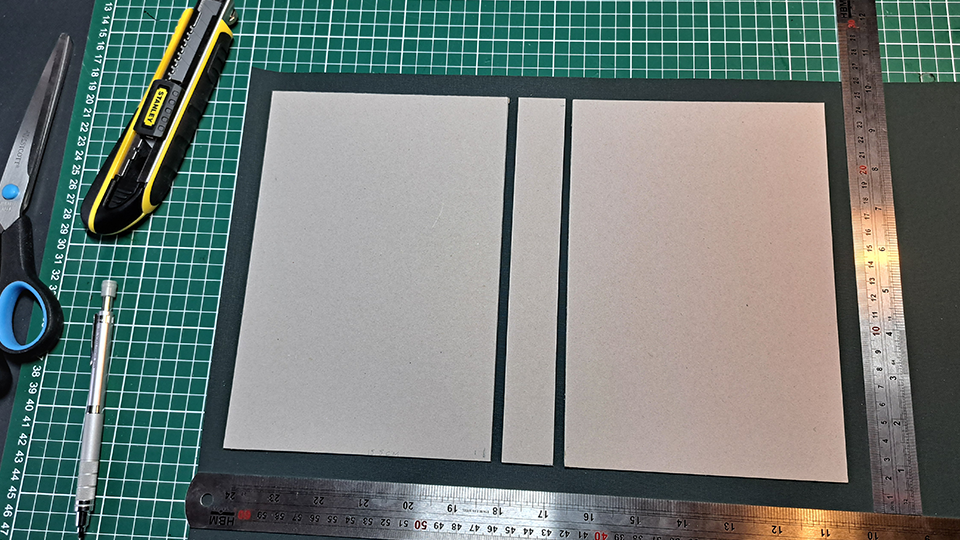
Now, using the straight angle technique again, cut your stacked covers (not the spine) to the length of your pencil mark with the utility knife, in multiple light passes. Try to keep the knife as vertical as you can so you’re not cutting at an angle.
Finally, use one of the covers as a ruler and carefully trim the spine to the same length. That’s the hardest part done!
Part 4: The cover material
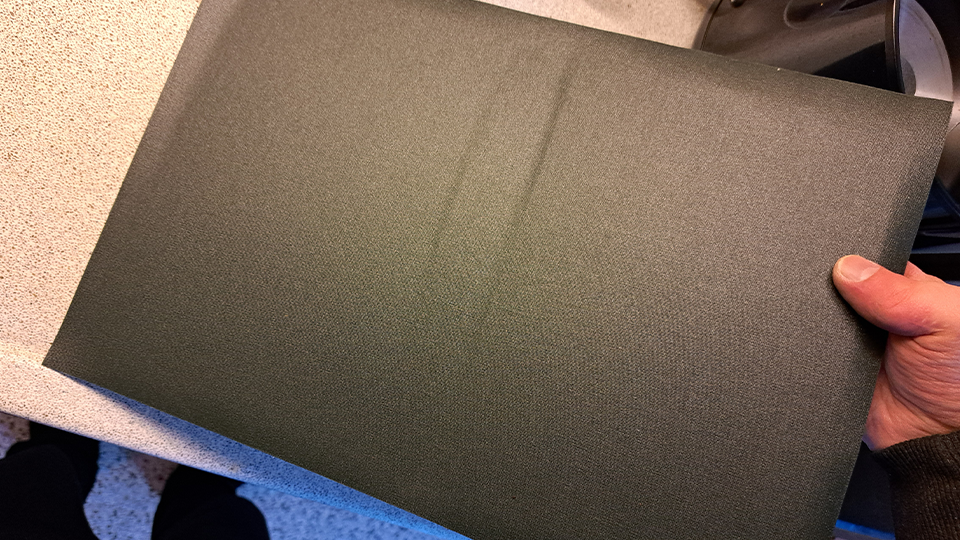
Next we need to get out our cover material, if you’re following along you probably have coated bookcloth like I do, but if you are using a different material you may need to look up how to treat it correctly before continuing!
Unroll your cloth and place your cover and spine pieces on it, leave a generous margin on all sides (1cm or more) and at least 5mm between the spine and the cover pieces. Then mark off the outer bounds of your cloth with a ruler and pencil. Straight is better for a neat finish, but it’s not the end of the world if you’re a little off.
Now, cut out your book cloth rectangle (knife or scissors, your choice). Next cut a strip of the same material at least twice the width of your plasticard, this basically needs to be able to reach the cover panels with a decent amount of overlap. Trim it down so it can fit underneath the elastic. Double check everything by putting it all on top of the cut out cloth again and seeing if you have enough margins and overlap.

Once you’re happy, it’s time to get messy.
Part 5: Get glue everywhere
Now, here is where you have a choice to make, if you didn’t buy the 3M spray glue you’re going to have to spread PVA glue as evenly as possible on the cover material. Any large clumps of glue will show on your finished product, so be fastidious about this.
If you were instead wise and bought the spray glue, put a newspaper down and hose down the bookcloth with magical spray glue.
In either case, give your covers and spine a wipe with a piece of cloth to make sure you don’t have any debris on it (debris between the panels and the cloth will show in the end result) and then stick them down, remembering to leave margins between all the pieces. Then rub carefully but firmly over the greyboard to ensure a good bond and no air bubbles. If you notice lumps or bubbles at this point, flip your work over and gently use your bone folder to work them out.
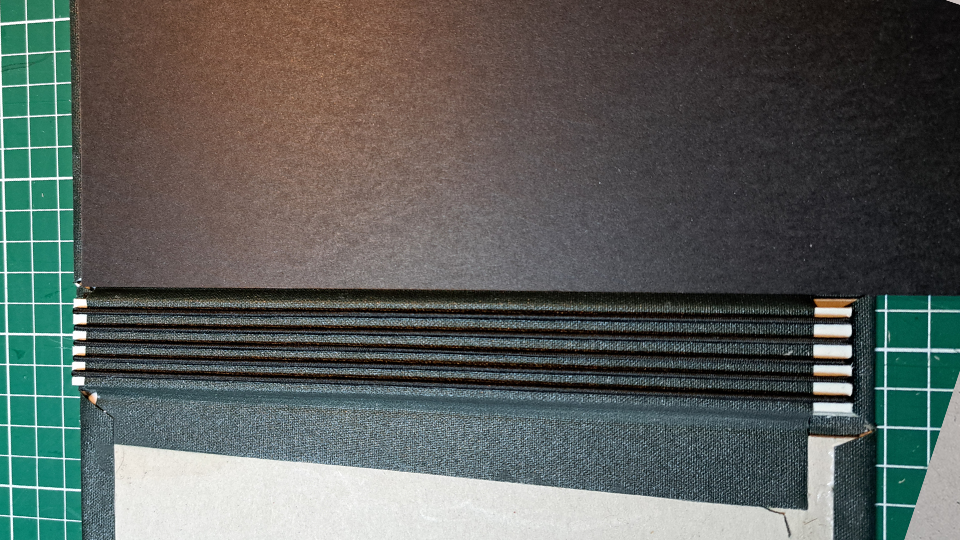
You should end up with something like this:
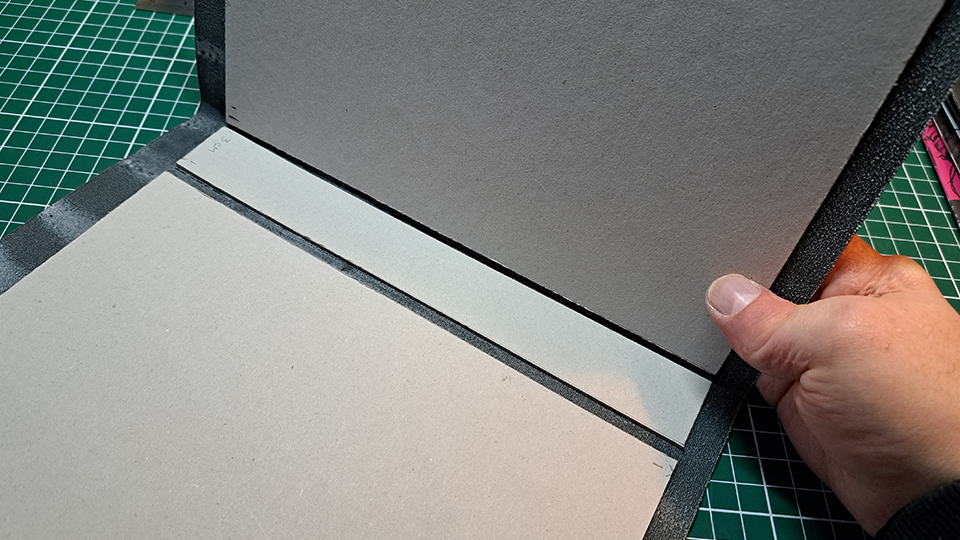
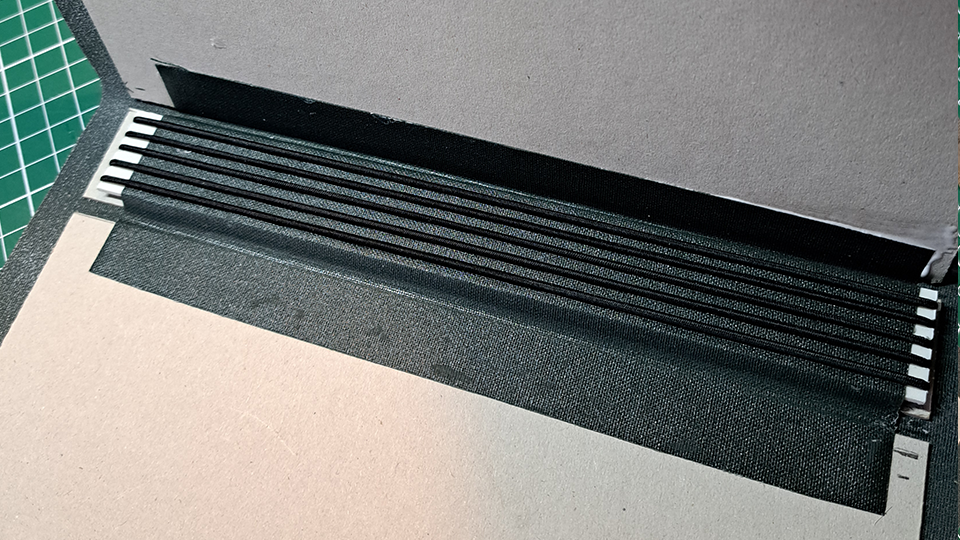
it’s important that your cover can fold without interfering with the spine (which is why we are leaving a gap), double check this before leaving it all to dry for an hour or so.
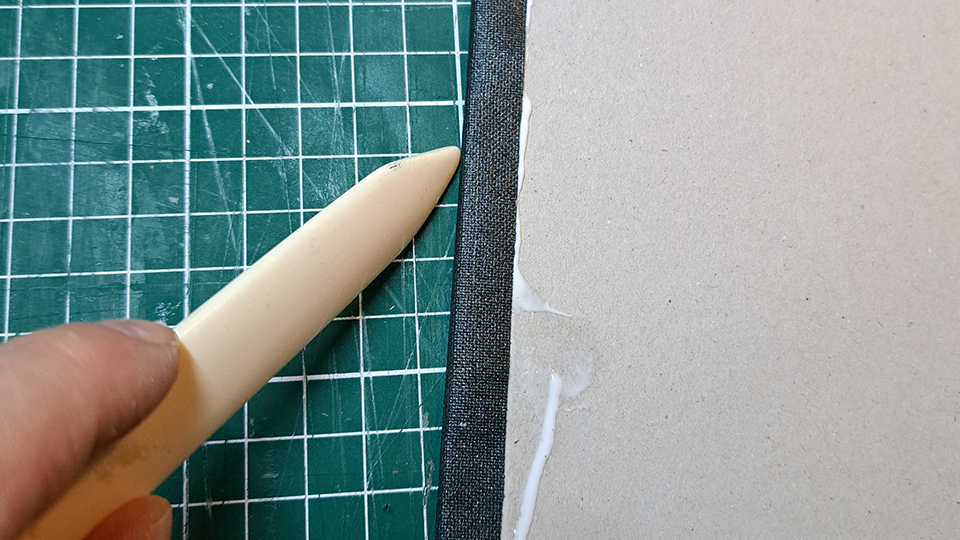
You’re very close now! Once your covers have dried, coat the small strip of fabric we made with a generous helping of PVA glue. The astute amongst you will notice I used my fingers for this, that is because I couldn’t find my foam brush and I am an idiot.
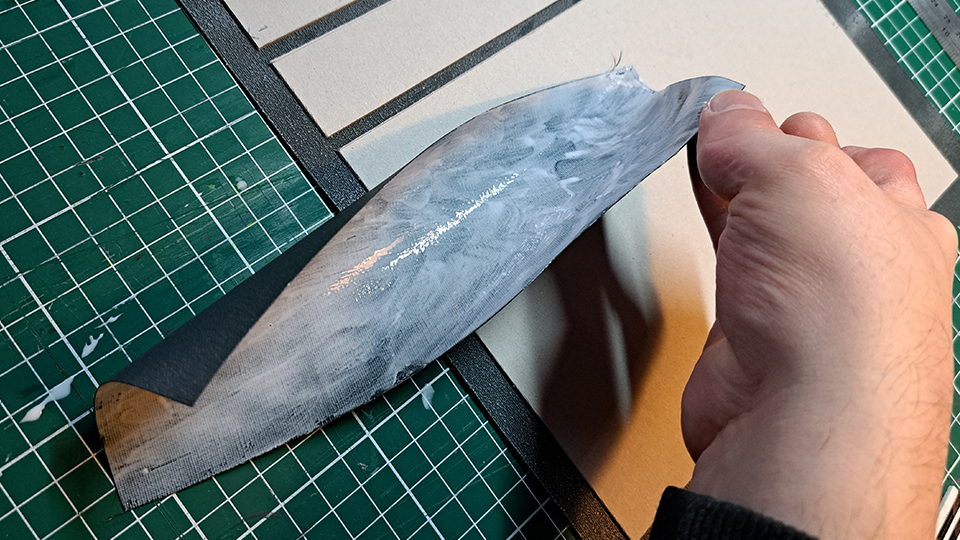
Insert this makeshift duct tape thing under your elastic, and then secure it to your covers. Use your bone folder to push it down and form a a nice crease alongside your plasticard (just rub it back and forth a bunch of times, you’ll see), the covers should be able to fold up freely as a result.
Rub off any glue squeezeout with your fingers and generally make a mess of yourself. Then peel the glue off your fingers like you’re 5 again. It’s fun, 10/10 do recommend.
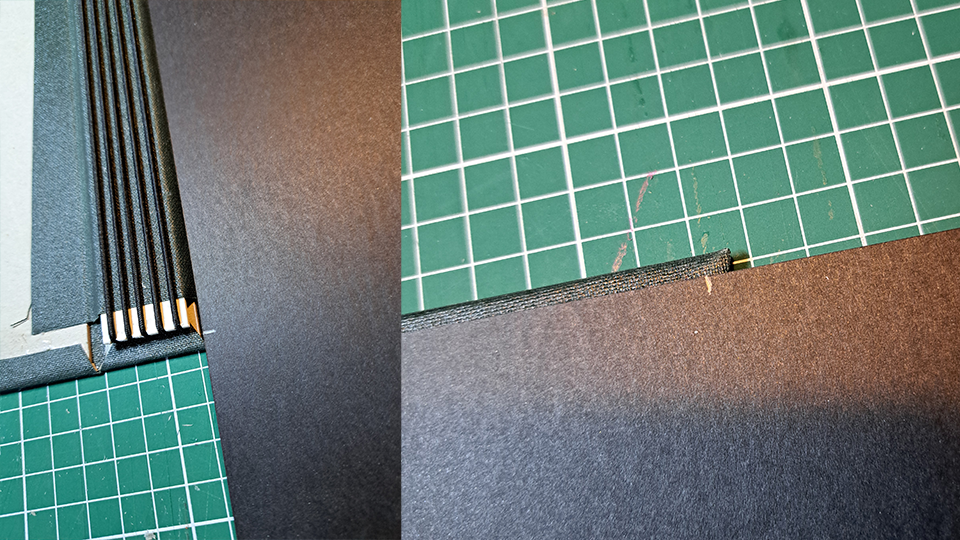
Next, find the center of your margin between the spine and cover panels, and cut two triangles out of the cover material like so:
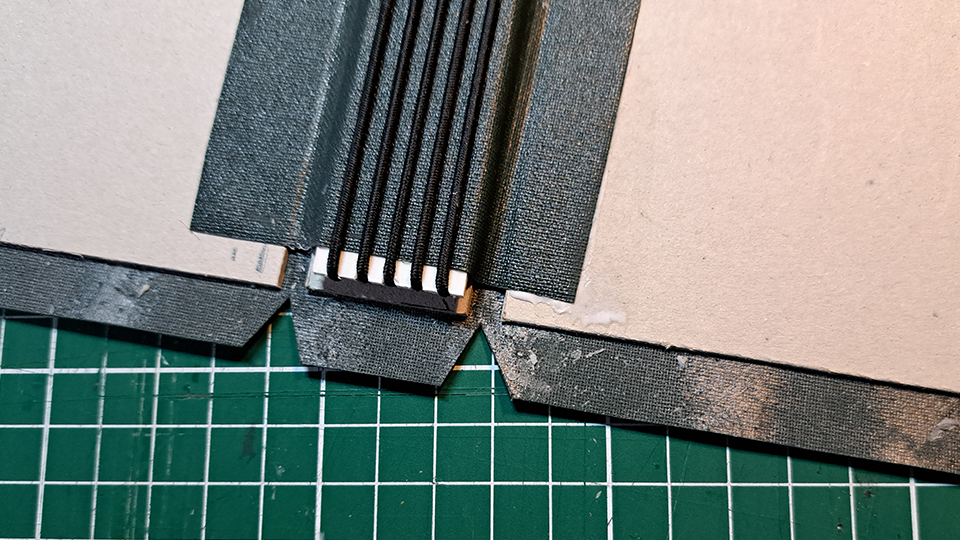
Coat the little tab near the spine with PVA, make sure you get it all the way up against the side of the grey board, and then tuck the flap behind the plasticard. Use your bone folder make a nice sharp crease. I recommend putting something heavy on the whole thing afterwards to make sure it’s all glued down properly.
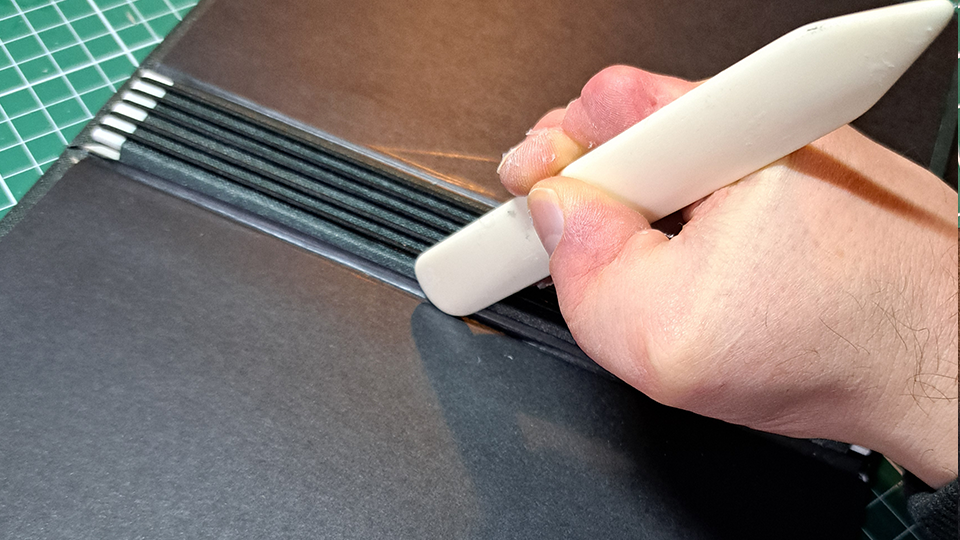
Next, get out your bone folder, and fold the outside edges of your fabric up by running it repeatedly along the board. Rub down the corners in both directions so you get a nice, visible crease.
Unfold your corners and trim the fabric along the crease, leaving a little extra (this will prevent your grey board poking out of the corners later.

Now it is time to glue and fold over the flaps onto the cover panels. You want to make sure your glue goes all the way to the edge but especially that there is enough glue on the edge of the greyboard. This will later harden into a nice firm edge for your binder!

Use your bone folder to fold the fabric over, make sure it is adhering to the edge of the board and that you aren’t leaving air bubbles on the edge, because that will leave a “soft” edge that feels cheap and bleh!
Wipe away any squeeze out with your finger, if you got glue on your fabric, just rub over it with your finger until it forms a little roll of glue and pick it off.
Step 6: Hide your crimes
While this step will not absolve you of any sins in your real life, it will let us hide all sorts of shortcomings in our work! Get your craft paper out, and slide it all the way up against the plasticard section.
Make pencil marks at about the halfway point of where the cover material is folded over the cover panels
Using the straight edge technique, cut your inside cover to size. This will cover any unsightly gaps and generally look very cool.
Apply glue all over your two inner cover pieces (much much easier with spray glue. Have I mentioned spray glue? Sponsor me, 3M!) and stick them down. Use your bone folder to rub the paper down into the gap between the spine and cover pieces.
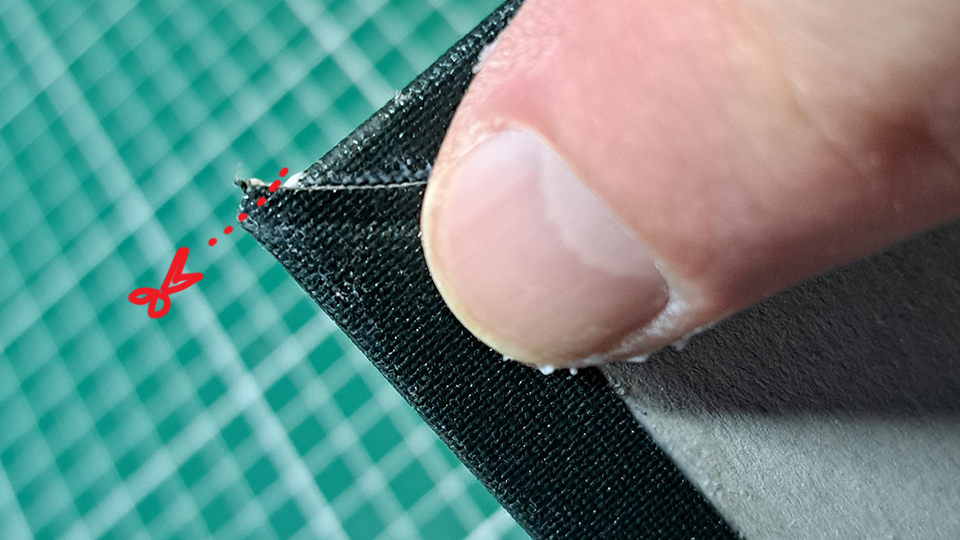
The next part of our crimescene cleanup will be the corners. If you have any weird bits sticking out, snip them with your scissors first.
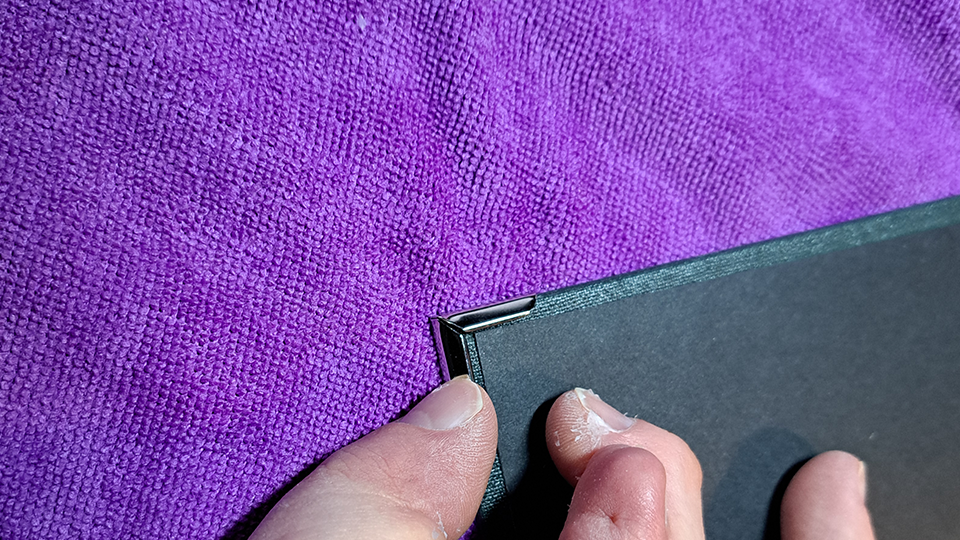
Now, get your metal corners and hammer out. Press the metal corner all the way on to the corner of your binder and hammer them on. Put something non-abrasive underneath so you don’t scratch up your corners!! I use a microfiber cloth for this. Gentle taps are better than big whacks. If your corner becomes a bit off center, just stand your binder up and gently tap exactly on the corner to force it back into place.
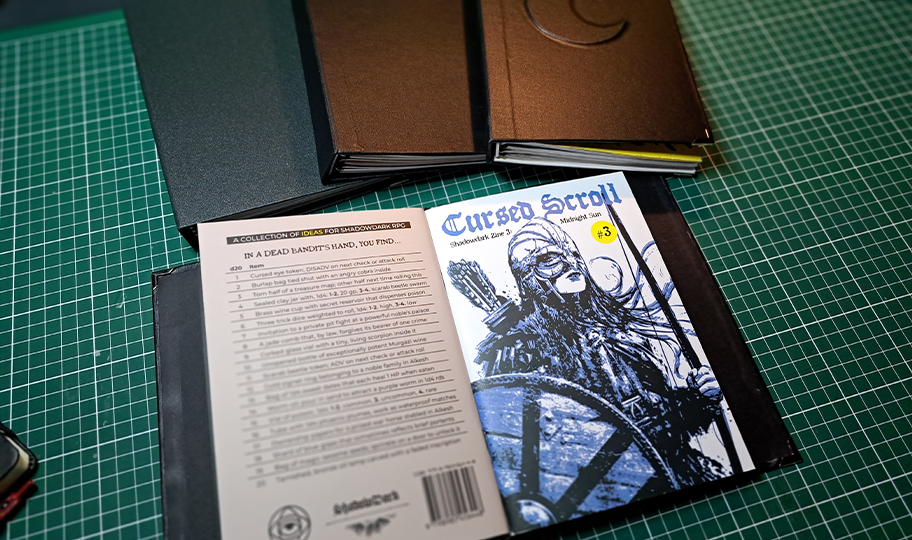
And now you’re done! Slide your zines into your binder, admire your handiwork, become rich and famous, impress hot people at parties.
Step 7: Final thoughts and additional ideas
You have now succesfully completed a basic zine binder! Go you! But you can do more!
If this basic binder is not exciting enough for you, consider decorating it. You can use stickers of course, but if you’re feeling fancy…
…the cover material has a small amount of stretch to it, you can leverage this to put designs underneath the cover material which you can then have showing through. Here’s an early attempt of mine at doing this:
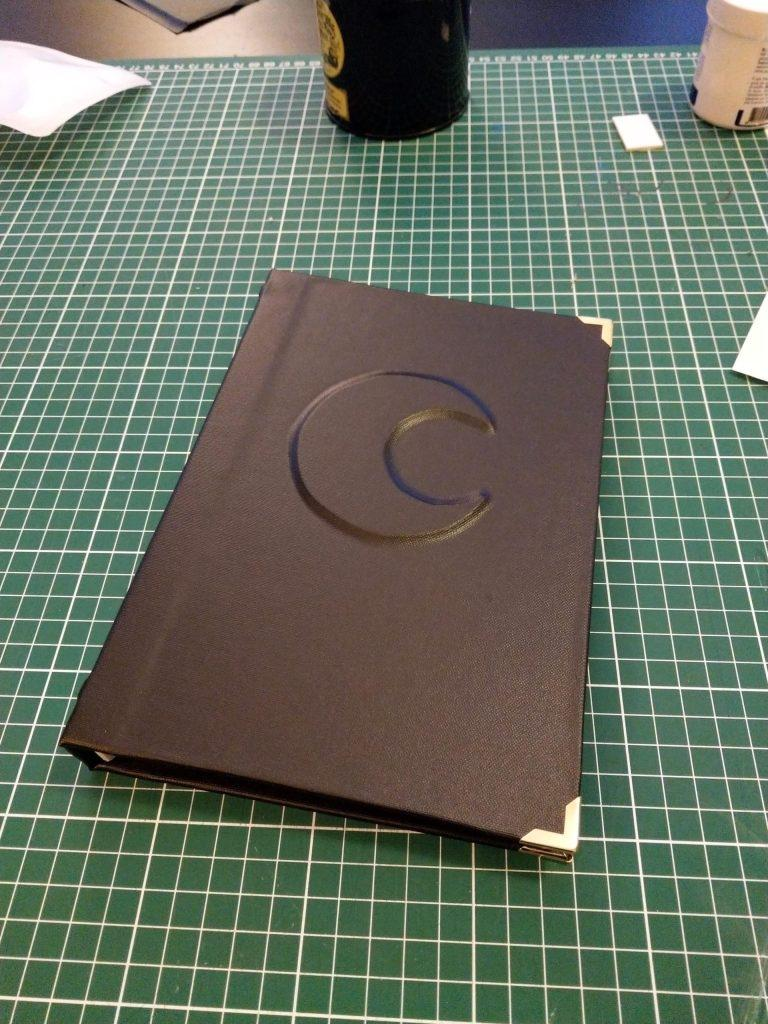
Now, this one is, to be completely honest, not great. If you’re going to do this, use less thick carboard for your designs than I did. 1mm thick should be about right. You will need to use your bone folder to trace the design and get it to stick to it properly.
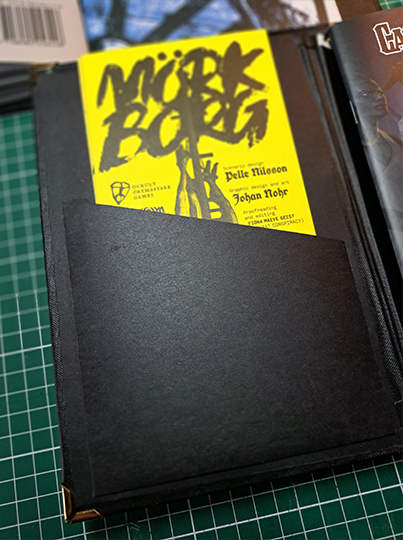
Another extremely fun AND useful modification you can do is make a little kraft paper pouch inside the covers, so you can store pamphlets in your binder too!
In any case, I hope this has proven useful to you, and please DO SHARE your zine binder efforts with me on Twitter! (@helicityboson)
2 Comments
Kyana
Thank you, this is very useful.
Martijn Vellinger
You are most welcome!